Updated: May 14, 2026
Please note that the user interface shown is slightly outdated and may not accurately represent the current state of the platform.
Before creating an Opportunity, ensure that the lead has been entered as a contact in
your CRM. If not please review the steps on Creating a Contact.
Quick method:
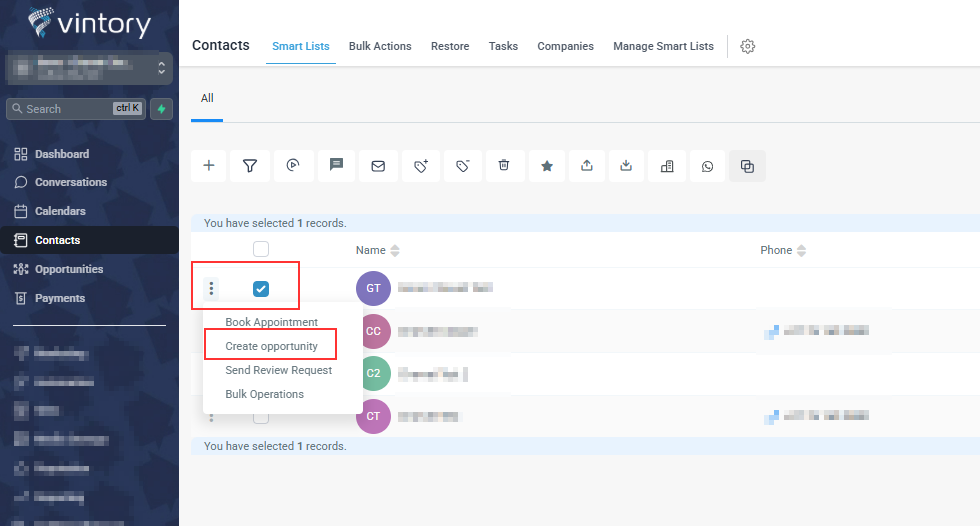
In Contacts, select the checkbox next to the contact’s name, click the three-dot menu, and choose Create Opportunity.
Here are the steps in creating Opportunities:
- Navigate to Opportunities in the menu pane.
- Within the "Opportunities" section, click on the "Add Opportunity" button located at the top of the page.
- Start typing the contact's name in the designated field.
- The CRM will display a dropdown list of matching contacts. Select the correct contact from the list.
- The contact's information will automatically populate.
- Review the populated contact information. If any details are missing, add them at this stage.
- To add tags, if applicable, enter keywords or phrases that describe the opportunity. Learn more about What are Tags.
- Enter the opportunity name. Automatically the client's name will be used.
- Specify the sales pipeline stage. Choose from options like "New Leads" or "Responsive Lead."
- Set the opportunity's status to "Opened."
- Enter the lead value, which to represent the projected gross rental rate for the year.
- Indicate the source of the lead. Use consistent terminology to ensure accurate reporting. Choose from options like "Email," "Owner Referral," etc.
- Use the notes section to provide any relevant information about the opportunity or lead interaction.
- Ensure that tags are correctly applied. Tags help in organizing and filtering opportunities.
- Double-check all entered information for accuracy.
- Once verified, click the "Create" button to finalize the opportunity creation.
Remember to regularly update and maintain your opportunities as you interact with leads and move them along the sales process. Properly managed opportunities can lead to increased conversions and better sales insights.
Note: You may create multiple opportunities for the same contact in the same pipeline.